Structure Sensor から距離画像やポイントクラウドを取得
前回の「Structure Sensor を Windows へ接続」の続きです。OpenNI2を使って距離画像(深度画像)・赤外線画像・ポイントクラウドを取得してみました。
ソースコード
Structure Sensor からデータを取得するC++のモジュール "structure_grabber" をGithubにおきました。
概要
距離画像・ポイントクラウドの取得は下記4つのファイルとOpenNI2ライブラリで可能です。
- structure_grabber.h
- structure_grabber.cpp
- oni2_grabber.h
- oni2_grabber.cpp
ただし、上記GitHubのサンプル内では、Visualizeのために距離画像についてはOpenCVを、ポイントクラウドについてはPoint Cloud Library (PCL)を使っています。
簡単な使い方
データ取得の方法を簡単に書くと下記の通りになります。
- インクルード:
#include <opencv2/opencv.hpp>
#include <pcl/point_types.h>
#include <pcl/point_cloud.h>
#include "structure_grabber.h"
- 設定
StructureGrabber grabber;
grabber.enableDepth();
grabber.enableInfrared();
grabber.setDepthRange(0.3, 5.0);
grabber.open();
- データの取得:
cv::Mat depth_image, infrared_image;
pcl::PointCloud<pcl::PointXYZ> cloud;

grabber.acquire();
grabber.copyDepthImageTo(depth_image);
grabber.copyInfraredImageTo(infrared_image);
grabber.copyPointCloudTo(cloud);
撮影結果1
撮影対象:

机の上にコップとお椀、後ろには椅子とホワイトボード。
距離画像と赤外線画像:
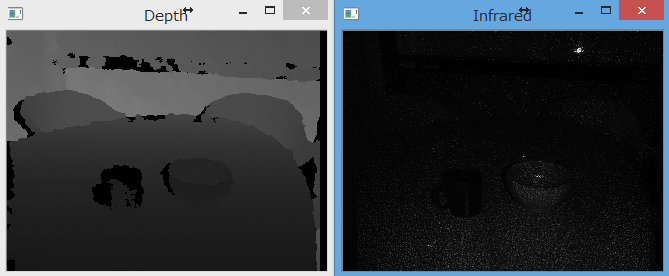
赤外線のLightCodingパターンが辛うじて見えます
(おまけ) 色付き距離画像:
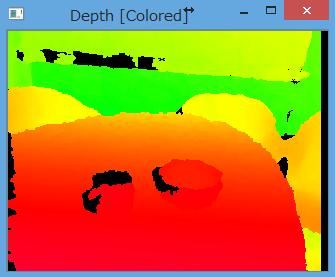
ポイントクラウド:

結構キレイにとれている感じがします。
撮影結果2
撮影対象:

廊下のT字路
距離画像と赤外線画像:
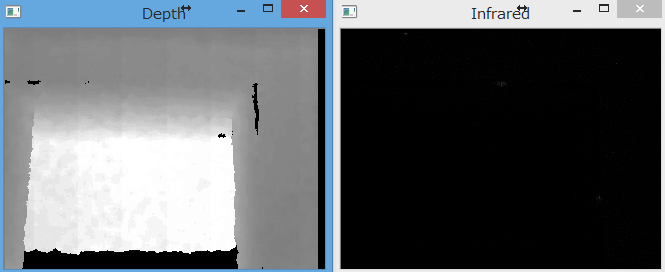
赤外線画像は人の目には何も見えない状態です。
ポイントクラウド:

3本の線は座標軸です。交点が撮影視点で、赤がX軸、緑がY軸、青がZ軸。
ちなみに俯瞰すると、遠くの方では誤差が目立ちます。
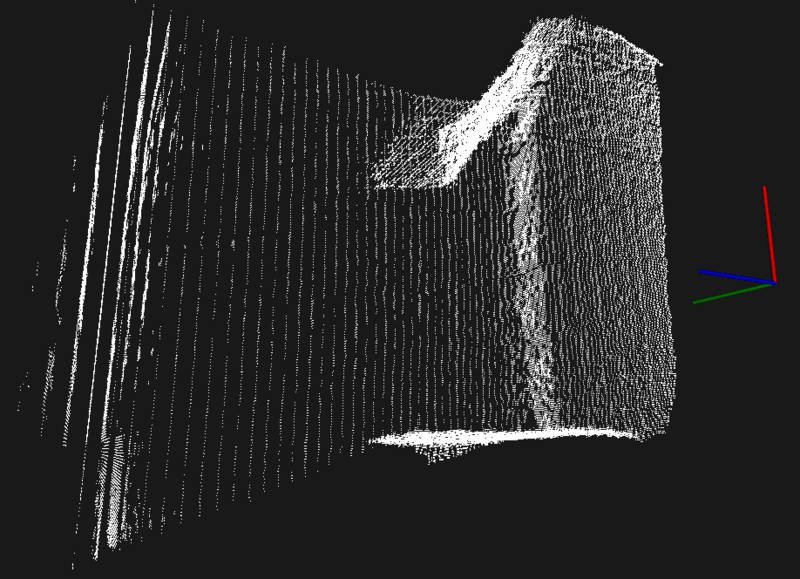
Kinectでも遠すぎるとこうなりますね。
さらに、4,5m離れた先では取得データが丸みを帯びてしまいます。
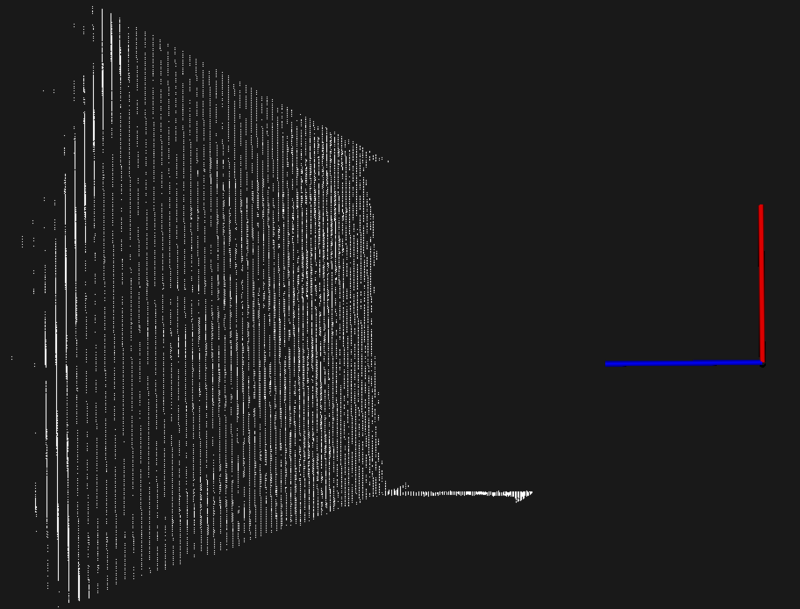
画像左側の円弧のように点が濃く分布しているところは、実際には平面です。公式データでは「40cm~3.5mの範囲で利用可能」と書いてありましたが、その通りなようです。
まとめ
- Structure Sensor を叩くモジュールを実装しました。
- 4m以上遠い場所の正確な3次元データは得られないことがわかりました。
Structure Sensor を Windows へ接続
はじめに
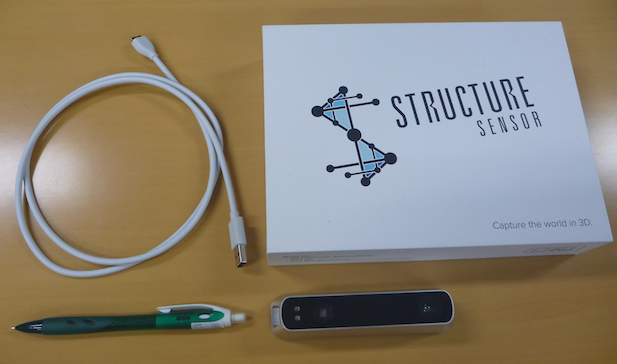
"Structure Sensor" というiOS向けの超小型デプスセンサーについて、いろいろな方が既にレビューをされています。(ちなみにデプスセンサーとは距離情報を取得できるセンサーで、MicrosoftのKinectを契機にかなり有名になりました。)
ただ、書かれている記事のほとんどが「iOSに繋げてみた」「デモアプリを使ってみた」ばかりのようなので、私は「iOS以外にUSB接続して、自力でデータを取り出す方法」を書きたいと思います。具体的には、今回はまず「Windowsから Structure Sensor を触る方法」を書いて、後に「Windowsで深度画像とポイントクラウドを取り出す方法」を書く予定です。
- (2014/07/02追記) 次記事:
環境の準備
Structure Sensor は iOS からは Structure SDK というものを使えば触ることができます。そしてiOS以外の場合は OpenNI2 (OpenNI1ではダメ) を使えばよいそうです。
というわけで、まずOpenNI2を用意。
OpenNI2は今はStructure Sensorの下記のサイトからバイナリやドキュメントがダウンロードできます。
インストール後はOpenNI2のフォルダ内のどこかにあるPS1080.ini内の
;UsbInterface=2
になっているところを
UsbInterface=0
に修正します。これでStructure Sensorからデータを読み出すことができるようになりました。
スクリーンの輝度が調節できない不具合の解決
何か月か前からノートPCのディスプレイ輝度が何かの拍子に調整できなくなってしまった。
(ちなみに環境はLet's note CF-AX2、Windows 8.1 Pro)
輝度調整ができないというのは、電源オプションの画面では映るはずの「画面の明るさ」調整バーが映らなかったり、Fn+F1,F2等のキーボードショートカットやチャームの「ディスプレイ」アイコンから操作しようとしても全く輝度が変更されないという状態。
この問題についていろいろ調べると下記のサイトを発見。
確かに自分もLogMeIn Hamachiを入れてから輝度調整できなくなってきたような気がしたので、もうHamachiが不要ということもあり次の手順を実行した。
- Hamachiのアンインストール
- デバイスマネージャー内「モニター」下にある「DPMSドライバー」をアンインストール
- 再起動
しかし、私の環境ではこれだけでは治らなかった。追加で次の手順を実行したら、調整できるようになった。
- 同じくデバイスマネージャー「モニター」の「汎用PnPモニター」を右クリックして「プロパティ」を選択
- 「ドライバー」タブ内の「ドライバー更新」をクリック
追加手順をやらない状態だと「PnP-Monitor (Standard)」ってのがアクティブな感じになっていたが、追加手順の後は「汎用PnPモニター」がアクティブになり、輝度調整ができるようになった。「PnP-Monitor (Standard)」が悪かったのかな?

(2014-06-18追記)
原因がわかりました。TeamViewerの「ブラックスクリーンを表示」という機能を使おうとしてインストールしたディスプレイドライバが上記の「PnP-Monitor (Standard)」であり、悪さをしていました。
解決方法はデバイスマネージャで「PnP-Monitor (Standard)」をドライバも含めて削除することです。削除するときに「画面が見えなくなって次の作業が何もできないんじゃ」と一瞬不安になりましたが、いざ消してみると「汎用PnPモニター」が自動的に有効になり、輝度調整もできるようになりました。解決。
SketchUpにポイントクラウドをインポート
デプスセンサで取得したポイントクラウドをSketchUpで作成した構造データとどれぐらい合うか目視で比較するために、SketchUpにポイントクラウドをインポートするプラグインを作りました。
メニューバー「プラグイン」から"Import Point Cloud..."を選択すると、ファイル選択ダイアログが表示され、ポイントクラウドをインポートできます。ポイントクラウドのデータ形式は、*.xyzかPCL (Point Cloud Library)で使われる*.pcd(ASCIIに限る)に対応しています。
なお、実際に取り込むのは点ではなく小さい立方体です。
- 使い方
下のコードをRubyコンソールに流し込むか、プラグインのディレクトリ(C:\Program Files (x86)\SketchUp\SketchUp 2014\Tools)に任意のファイル名で保存します。
# First we pull in the standard API hooks.
require 'sketchup.rb'

# Create a tiny box (2r*2r*2r)
def draw_point(x, y, z, r=5.mm)
  model = Sketchup.active_model
  entities = model.entities

  # Create a plane on x-y plane
  pt1 = [x - r, y - r, z - r]
  pt2 = [x + r, y - r, z - r]
  pt3 = [x + r, y + r, z - r]
  pt4 = [x - r, y + r, z - r]
  new_face = entities.add_face pt1, pt2, pt3, pt4

  # Thicken the plane
  new_face.pushpull r * 2
end

# Create a lot of tiny boxes
def draw_pointcloud(filename)
  index = 0;
  index_begin = 0;

  # If ".pcd", data starts from line 11
  if(File.extname(filename) == ".pcd") then
    index_begin = 11;
  end

  begin
    open(filename) {|file|
      while l = file.gets
        if index >= index_begin then
          p = l.split(' ')     # Modified from "p = l.encode.split(' ')"
          if p.size >= 3 then
            draw_point(1000.mm * Float(p[0]), 1000.mm * Float(p[1]), 1000.mm * Float(p[2]))
          end
        end
        index += 1
      end
   }
  rescue => ex
    UI.messagebox("Error!\n" + ex.message)
  end
end

# Add a menu item to launch this plugin.
UI.menu("Plugins").add_item("Import Point Cloud...") {
  file = UI.openpanel("Open Point Cloud File", "C:/", "Point Cloud File (*.pcd,*.xyz,*.txt)|*.pcd;*.xyz;*.txt;||")
  if file then
    draw_pointcloud(file)
  end
}
インポートするとこんな感じです。

boostでXMLの読み書き
boostを使ったXML読み書きのサンプル。
参考:
https://sites.google.com/site/boostjp/tips/xml
http://stackoverflow.com/questions/6656380/boost-1-46-1-property-tree-how-to-iterate-through-ptree-receiving-sub-ptrees
こんな感じのサンプルXMLを読み書きします。
<?xml version="1.0" encoding="utf-8"?>
<parent>
  <children>
    <child type="age">3</child>
    <child type="age">5</child>
    <child type="age">7</child>
    <child type="age">12</child>
  </children>
</parent>
#include <iostream>
#include <vector>
#include <iterator>
#include <string>
#include <boost/property_tree/ptree.hpp>
#include <boost/property_tree/xml_parser.hpp>
#include <boost/foreach.hpp>
#include <boost/lexical_cast.hpp>

struct Child {
	int age;
	Child() : age(0) {}
	Child(int a) : age(a) {}
};

struct Parent {
	std::vector<Child> children;
	inline void init() { children.clear(); }
	inline void addChild(int age) { children.push_back(Child(age)); }
	void describe() {
		std::cout << "--- Describe begin --\n";
		for(std::vector<Child>::const_iterator cit = children.begin(); cit != children.end(); cit++)
			std::cout << cit->age << std::endl;
		std::cout << "--- Describe end --\n";
	}
};

void save(const std::string &xml_file, const Parent &parent) {
	boost::property_tree::ptree pt_parent;
	for(std::vector<Child>::const_iterator cit = parent.children.begin(); cit != parent.children.end(); cit++) {
		boost::property_tree::ptree &pt_child = pt_parent.add("parent.children.child", cit->age);
		pt_child.put("<xmlattr>.type", "age");
	}
	boost::property_tree::write_xml(xml_file, pt_parent, std::locale(), boost::property_tree::xml_writer_make_settings(' ', 2, boost::property_tree::detail::widen<char>("utf-8")));
}

void load(const std::string &xml_file, Parent &parent) {
	parent.init();
	boost::property_tree::ptree pt_parent;
	boost::property_tree::read_xml(xml_file, pt_parent);
	BOOST_FOREACH(const boost::property_tree::ptree::value_type &v, pt_parent.get_child("parent.children")) {
		// v.first is the name of the child.
		// v.second is the child tree.
		const boost::property_tree::ptree &pt_child = v.second;
		if (boost::optional<int> age = pt_child.get_optional<int>("")) {
			parent.addChild(age.get());
		}
	}
}

void main() {
	std::string xml_file("test.xml");
	Parent parent1;
	parent1.addChild(3);
	parent1.addChild(5);
	parent1.addChild(7);
	parent1.addChild(12);

	parent1.describe();
	save(xml_file, parent1);

	Parent parent2;
	load(xml_file, parent2);
	parent2.describe();

	std::system("pause");
	return;
}

